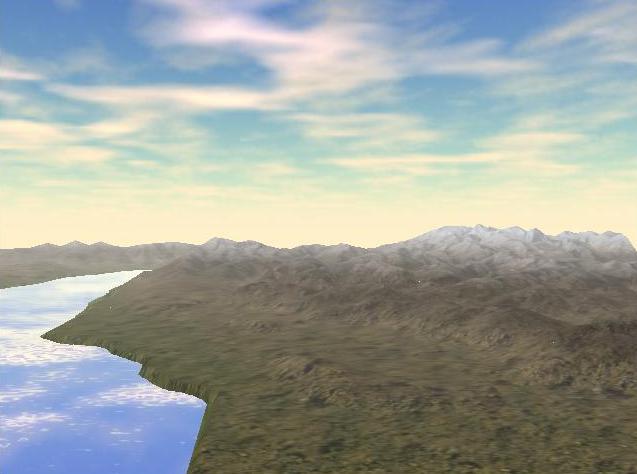
Textures
In order to get a realistic terrain, it is not sufficient to have a mesh as described in the previous part. It is also needed to take texturing into consideration for this terrain, by applying color to each point in the mesh. For this part we used the Cg, which is the graphics cards programmation language from nVidia. This method helps us in parting the work between the CPU and the GPU, since one part of the calculation is only done on the graphics card and isn't transmitted on the bus.
We chose to focus our research on two visualisation types:
- the first one is focused on information visualization, with implementation of a 3D map and a gradient-based colored view based on the terrain height;
- the second one is focused on terrain photo-realism, using a few textures depending of the terrain height.
We will further detail those views and the path that led to the results you'll see below.
Information visualization
In order to start working as soon as possible, we tried simple yet effective view, so that we could test the lightmap and geomorphing. This first view was rendering the terrain as levels, depending on the height. Then we implemented a 3D map view. The results for those 2 views are presented below.
Level-based rendering
This view is based on the principle of rendering different levels depending on the height of the terrain. At first, we implemented a version with hardcoded level values. This method's main drawback was not being able to easily change the level values or the level colors. We thus chose to use a layered color gradient, so that the user could change the levels and colors easily. The example below shows the result using a gradient on the terrain.
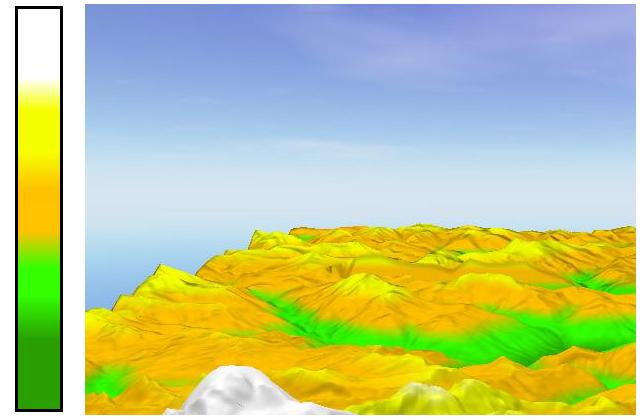
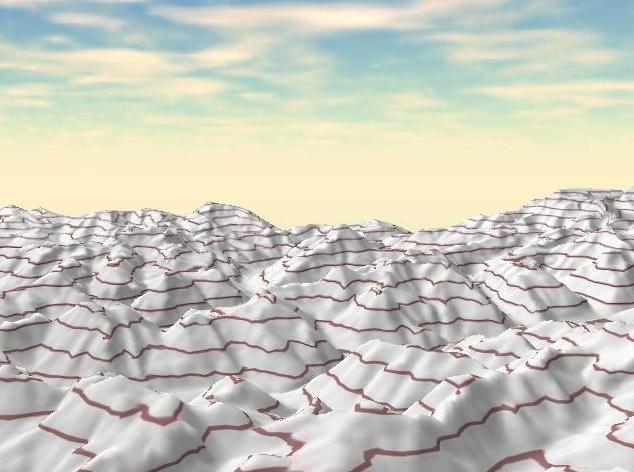
This method is powerful enough to allow us to define different views by changing only the gradient texture, for we can get interesting effects such as the view shown below, where we draw level curves, by drawing lines in the gradient texture:
3D Map Rendering
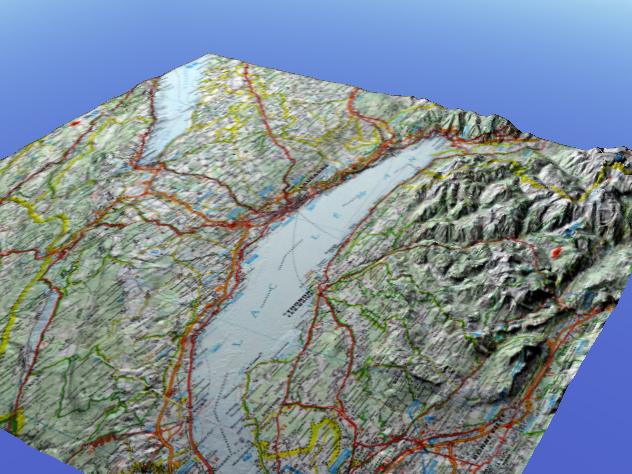
We wanted to experiment a terrain view using information that could be more useful to a user. We thus used a map, and scanned the region we were working on. This method requires a high definition texture. Of course, it is then needed to create a new texture for each new terrain, but doing it another way is difficult, since we are using terrain-specific information. Distortions appear when height transitions are too rough. This problem is partly resolved with high-detail textures, but this problem should be considered more deeply to get better looking results. Here is an example we get for this rendering mode:
Realistic view
To render a terrain in a realistic way, we need to use textures. Those textures can be combined to get a better visual result. To obtain that result, there are mainly two ways:
Textures can be used along with transparency masks, which would be used to indicate where to apply each texture. Combining these textures makes it look like a single texture. This method is shown below with 2 textures being applied:
 Transparency layers combination
This method's advantage is to allow us to define interesting zones in the terrain directly in textures, but it also has some drawbacks. First of all, each texture has to be the size of the whole terrain, and there may be resolution problems, for having a large terrain implies using very good textures in order to have details when getting close to the terrain. Furthermore, this method is not automated: each new terrain must come with the full set of textures.
- Various textures can be interpolated depending on the terrain height. Those textures have no need to be used with transparency layers. This method has some advantages. Textures can be of lower resolution, and can be easily changed. More than that, we can use the same texture set for all terrains, since the texture choice depends on the terrain height.
We chose the second method for many reasons. This project's goal is to render a very large map, so we do need to optimize all the application's parts, but the first method described here is way too memory consuming. Moreover, the second one allows more flexibility for the user as one can easily change a texture whithout having to redraw anything.
Simple linear interpolation
The first shader we made uses a set of five textures. These textures are chosen depending on the map's height, i.e. one defines a zone of height per texture and the changing from one to another is done by a linear interpolation in order to obtain a fading effect from a texture to another and increase quality. The figure below shows you the result of this kind of technique:
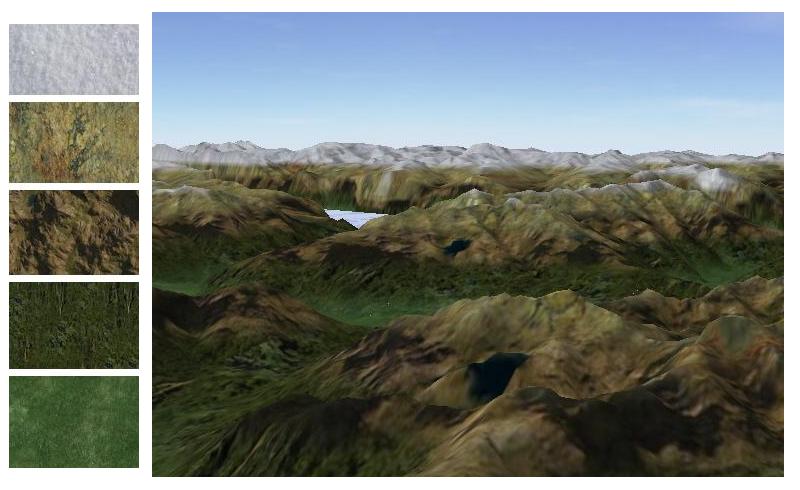
The drawback of this method is a big limitation on the textures' interpolations, so that we see transitions like on the image above. So we sought another method to circumvent this problem.
Gradient based interpolation
In a second time, we added gradients to define transitions of zones in a more easily way. It is a simple principe: one procede with multiple layers. For each one, one use a 1D gradient in shades of grays and a texture. White represents a full texture and black is a transparent zone where you can see the other layers previously computed. Drawing below shows you the result of this kind of operation:
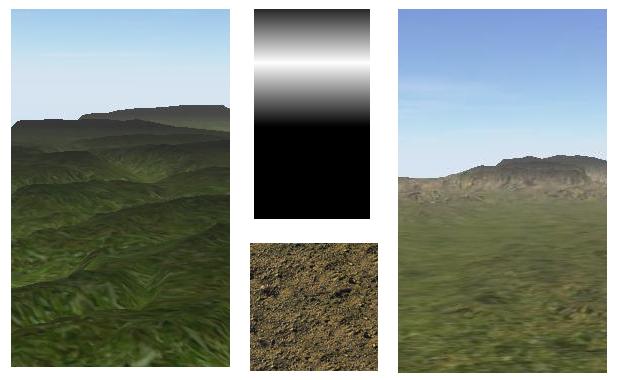
This method is far more richer than previous ones. First, transitions are smoother as it is possible to add many textures to the same level and gradients can overlap same zones of transitions. Then it allows to have more precise textures whithout increasing memory usage (in other words, they can be repeated more) whithout being noticeable. You can see below an example using this technique, where we can clearly see smooth transitions from a height to another.
